 Save to Pinterest
 There's something about the way phyllo crisps up in the oven that reminds me of a lazy afternoon at my cousin's farmhouse, where we'd wander into the kitchen and find her assembling little golden nests from whatever cheese scraps were lingering in her cellar. I'd never thought of phyllo as "hay" until she handed me a nest, and I understood exactly why. This rustic barnyard came together almost by accident that day, just us playing around with what we had, and it's been my go-to whenever I want something that feels both effortless and special.
I brought these to a dinner party once where everyone was arriving within the hour, and I nearly panicked thinking I'd bitten off more than I could chew. But the phyllo nests baked while I was still getting the coffee ready, and by the time guests arrived, they were cool and ready to top. That moment when someone bit into one and their eyes went wide—that's when I knew this recipe was a keeper.
Ingredients
- Shredded phyllo dough (kataifi), 200 g: This is the secret to looking fancy without stress; it crisps up faster than you'd expect and holds its shape like a little nest naturally wants to.
- Unsalted butter, 50 g melted: The phyllo's best friend—it browns slightly in the oven and gives you that nutty, toasted flavor that makes people ask what you did differently.
- Olive oil, 1 tsp: Just enough to help the butter coat evenly and keep things from sticking together in the pan.
- Sea salt, a pinch: Never skip this; it's the tiny thing that wakes up all the other flavors.
- Farmhouse cheddar, 200 g cut into rustic hunks: Look for something aged enough to have real character; the sharper the better when you're balancing it against the sweetness of honey.
- Aged gouda, 150 g cut into rustic hunks: This brings a caramel note that plays beautifully against the crispy phyllo.
- Tomme de Savoie or semi-soft farmhouse cheese, 150 g cut into rustic hunks: If you can't find this, any creamy, slightly funky farmhouse cheese works—it's your wildcard.
- Fresh thyme sprigs, optional: A small handful is all you need; it signals "I know what I'm doing" even if you just grabbed it five minutes before serving.
- Honey for drizzling, optional: A touch of warmth and sweetness that makes the whole thing feel more intentional.
- Cracked black pepper, optional: The final flourish that ties everything together.
Tired of Takeout? 🥡
Get 10 meals you can make faster than delivery arrives. Seriously.
One email. No spam. Unsubscribe anytime.
Instructions
- Heat your oven and prepare:
- Preheat to 180°C (350°F) and line a baking sheet with parchment paper. This is the moment to get your workspace ready so nothing feels rushed once the phyllo is in your hands.
- Loosen and coat the phyllo:
- The shredded phyllo often clumps slightly, so gently tease it apart with your fingers until it feels light and airy. Drizzle the melted butter, olive oil, and salt over it, then toss gently with your hands—you want every strand kissed with fat, but not matted together.
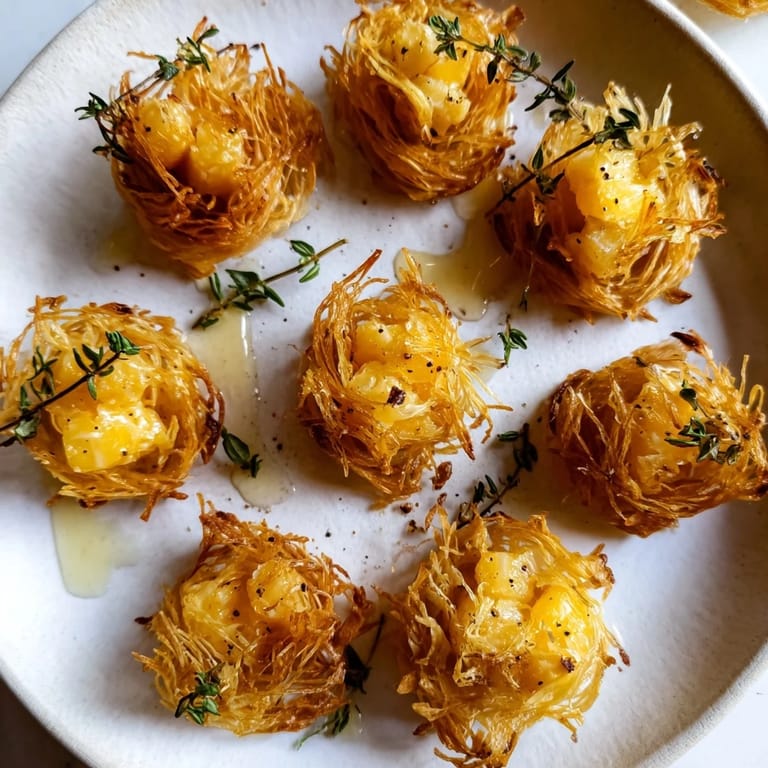
- Form little nests:
- Take a small handful of the buttered phyllo (about 5–6 cm wide) and press it lightly onto the parchment sheet, keeping it loose enough that it holds its shape but doesn't feel overworked. You'll have room for about six nests on a standard baking sheet.
- Bake until golden:
- Watch them around the 10-minute mark; they go from pale to deeply golden-brown quickly. When they're the color of toasted hay, they're ready. Let them cool to room temperature on the sheet so they finish crisping up.
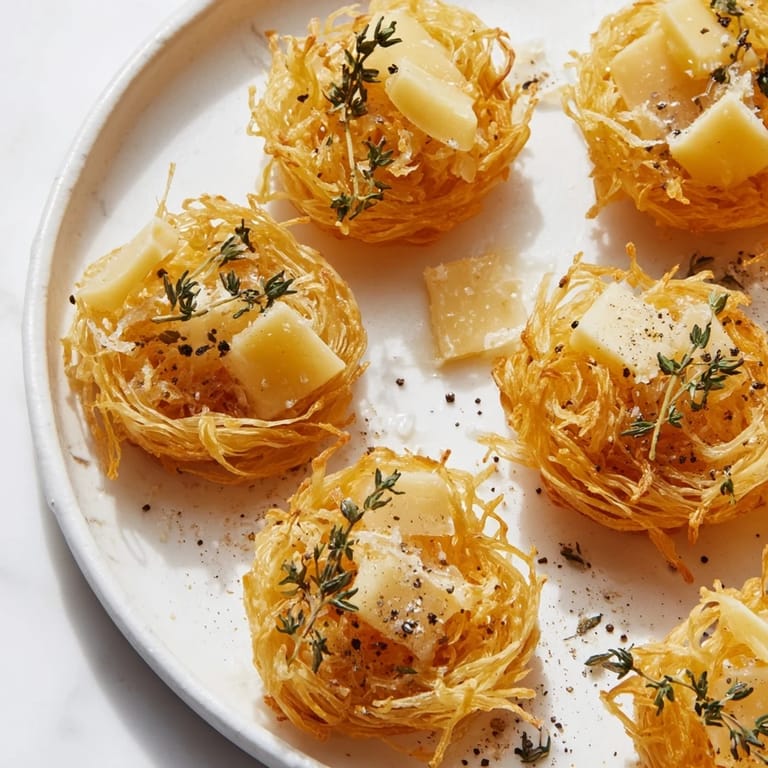
- Build and top:
- Once cool, arrange your nests on a serving board or platter and nestle a generous hunk of each cheese into or beside each nest. The rough, rustic cut of the cheese matters here—it looks more intentional and appetizing than neat cubes.
- Finish with flourishes:
- Add a small sprig of thyme to each nest if you like, then drizzle honey in a thin thread across the whole board, and finish with a scatter of cracked black pepper. The contrast of sweet, salty, and savory is what makes people reach for another.
 Save to Pinterest
 I remember my neighbor stopping by right after I'd made a batch, and she took one bite and asked if they were store-bought. That question made me laugh because the whole point of these is that they're so simple they almost feel like cheating, but they taste like you've done something real and deliberate in your kitchen.
Choosing Your Cheeses
The beauty of this dish is that it celebrates whatever cheeses speak to you. I started with the trio I mentioned because they cover the spectrum—sharp cheddar, nutty gouda, and something creamy and pungent to round it out. But I've made these with Manchego for a Spanish angle, or a smoked farmhouse cheese when I'm feeling a bit bolder. The only rule is that each piece should be substantial enough that you actually taste the cheese's personality, not just a thin coating of flavor. Hunt for cheeses at a farmers market or a good cheese counter where someone can tell you what's actually worth your money.
Variations and Flavor Twists
If you want to take these in a savory direction, dust the phyllo with herbes de Provence or a pinch of smoked paprika before baking. I've also sprinkled finely grated lemon zest into the phyllo mixture and served the nests with grapes, which shifts the whole thing into something more elegant and meal-like. For autumn, try adding crushed walnuts to the phyllo, or if you're in the mood for something unexpected, a tiny drizzle of hot sauce under the cheese brings the whole thing into focus.
Serving and Storage
These nests are best served at room temperature, right after you've topped and garnished them. They'll hold their crispness for a couple of hours on a board, which makes them perfect for a gathering where you want things prepped but not rushed. The phyllo nests themselves can be made up to a day ahead and stored in an airtight container; just add your cheese and garnishes right before people arrive. The minute you add honey or fresh herbs, the clock starts ticking, so think of those as the final ten minutes of your prep.
- Store baked phyllo nests in an airtight container at room temperature to keep them crisp and ready.
- Top the nests no more than a couple of hours before serving so the phyllo stays shatteringly crisp.
- If you're making these for a dinner party, you can bake the phyllo earlier in the day and assemble everything right before guests arrive.
 Save to Pinterest
 This recipe is my reminder that sometimes the most memorable food comes from playing in the kitchen with whatever you have and saying yes to a little bit of friendly experimentation. Serve these, watch people's faces light up, and know that you've made something that feels both rustic and refined without breaking a sweat.
Recipe Questions
- → What type of phyllo dough is best for the nests?
Shredded kataifi style phyllo dough creates the perfect crisp, nest-like texture when baked.
- → Can I use different cheeses for the topping?
Yes, cheeses like Manchego, Comté, or smoked farmhouse varieties can add great flavor variations.
- → How do I prevent the nests from becoming soggy?
Ensure the phyllo nests are fully baked until golden and cooled before adding cheeses and garnishes.
- → What garnishes complement the nests well?
Fresh thyme, a light honey drizzle, and cracked black pepper enhance both aroma and taste.
- → What serving suggestions pair nicely with these nests?
Apple slices or grapes offer a refreshing contrast to the savory cheeses and flaky phyllo.