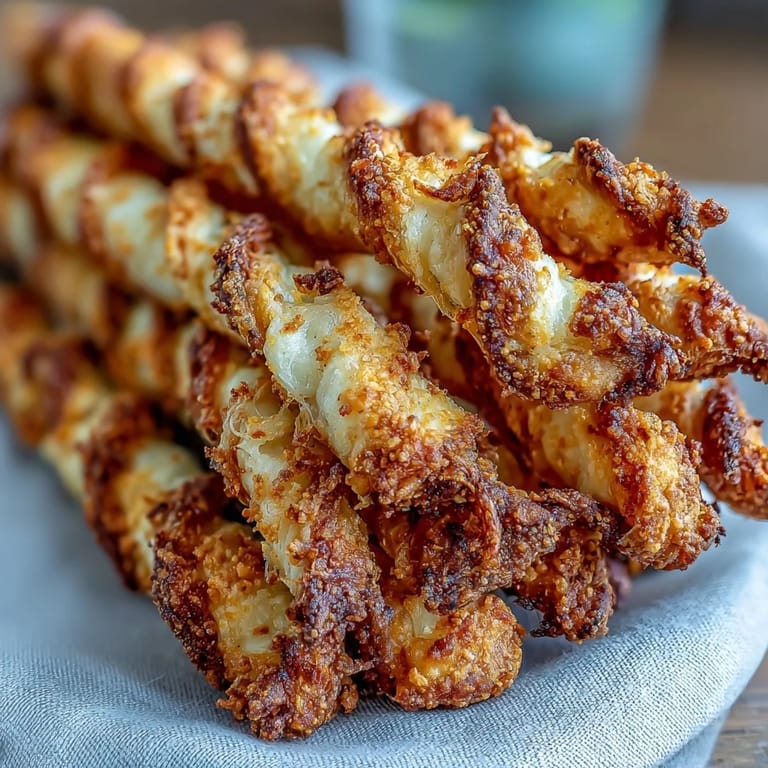
 Save to Pinterest
 My sister called me on Derby Day morning with that familiar panic in her voice—she'd volunteered to bring appetizers and had exactly two hours before guests arrived. I'd made these cheese straws the week before for a book club meeting, and she remembered how quickly they disappeared from the table. Twenty minutes later, we were standing in her kitchen watching the oven work its magic, and by the time the first guests knocked on the door, we had golden, crispy straws piled high on a platter. It turns out the best party food is the kind that doesn't require fussing once people start arriving.
I still laugh thinking about the time I brought these to a neighborhood gathering where someone's grandmother was visiting from Charleston. She took one bite, paused, and said, "Now this is how it's supposed to taste," which coming from her felt like winning a Michelin star. That single moment made me understand why good food matters—it's not about impressing anyone, it's about hitting that note that says home.
Ingredients
- Sharp cheddar cheese, freshly grated: One and a half cups might seem like a lot, but it's what gives these their punch and that beautiful golden color—avoid pre-shredded if you can, as the coating prevents it from melting smoothly into the dough.
- Parmesan cheese, finely grated: Half a cup adds a subtle nuttiness and helps everything stay crispy and flaky rather than greasy.
- Unsalted butter, cold and cubed: Cold is the secret word here—warm butter makes the dough greasy instead of flaky, so pull it straight from the fridge.
- All-purpose flour: One and a quarter cups is just enough to hold everything together without making these tough or bread-like.
- Cayenne pepper: Half a teaspoon is my usual starting point, but taste as you go because cayenne brands vary wildly in heat.
- Fine sea salt and freshly ground black pepper: These seem small but they're what prevent the cheese from tasting flat and one-dimensional.
- Cold water: Keep this optional backup nearby—humidity in your kitchen will determine whether you need it.
Tired of Takeout? 🥡
Get 10 meals you can make faster than delivery arrives. Seriously.
One email. No spam. Unsubscribe anytime.
Instructions
- Set the stage:
- Preheat your oven to 375°F and line a baking sheet with parchment paper—this part takes two minutes and prevents that frantic moment where you realize your dough is ready but the oven isn't.
- Build the flavor foundation:
- In a food processor, combine the cheddar, Parmesan, flour, cayenne, salt, and black pepper, pulsing just until everything is evenly distributed and smells incredible. This step should take about 30 seconds—you're not trying to make a paste, just mixing everything together.
- Cut in the butter:
- Add the cold, cubed butter and pulse until the mixture looks like coarse bread crumbs with some pea-sized pieces of butter still visible. This is what creates the flakiness, so don't overmix—you want it to look a little rough and unfinished.
- Bring it together:
- If the mixture seems too dry to hold together, sprinkle one tablespoon of cold water over it and pulse gently, checking after each addition. Most of the time you won't need it, but humidity happens.
- Roll and shape:
- Turn the dough onto a lightly floured surface and roll it into a rectangle about a quarter inch thick—this takes a minute and doesn't need to be perfect. Using a knife or pastry cutter, cut strips about half an inch wide and six inches long, then transfer them to your prepared baking sheet, spacing them slightly apart so heat can circulate around each one.
- The golden moment:
- Bake for 12 to 15 minutes, watching as they transform from pale and doughy to deep golden and crisp—the exact timing depends on your oven's personality. You'll know they're ready when the edges are noticeably darker than the centers and the whole kitchen smells like toasted cheese.
- Cool with patience:
- Let them rest on the baking sheet for five minutes, which helps them firm up without becoming brittle, then transfer to a wire rack to cool completely. If you try to eat them right away they'll be soft, but five minutes later they'll have that perfect shatter-and-crunch texture.
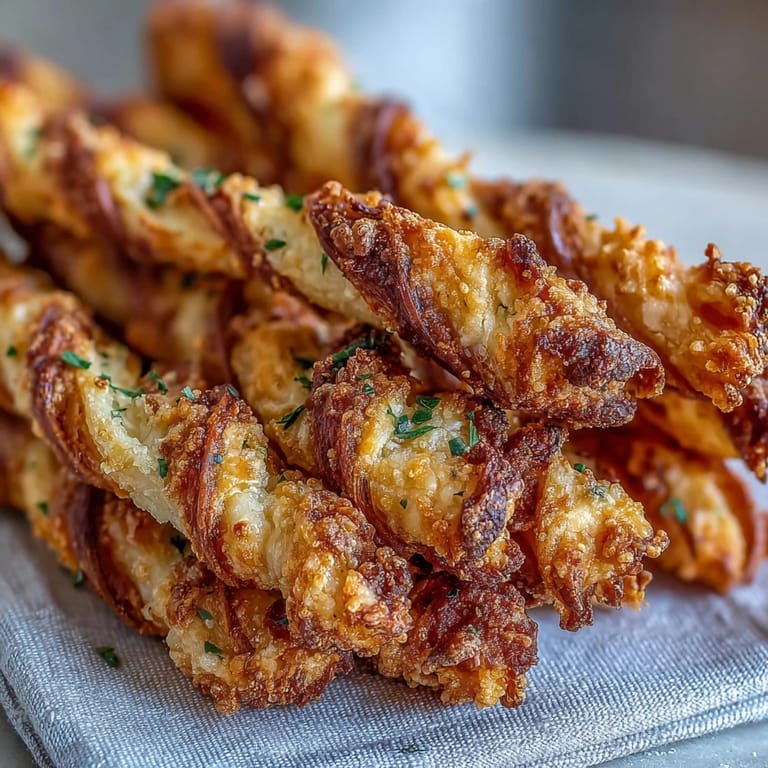 Save to Pinterest
 There was an afternoon when my niece helped me make these, and she got so focused on cutting perfectly straight straws that she missed the fact that mine were all slightly wonky. When they came out of the oven, hers looked neater but mine tasted exactly the same, which taught her something that cooking lessons can't quite explain—precision matters less than care. That's when food becomes something more than sustenance.
Why These Work for Every Occasion
I've brought these to Derby Day parties, book clubs, unexpected dinner guests, and quiet evenings with a cup of tea, and they fit every single scenario. There's something about a homemade savory snack that says you cared enough to spend thirty minutes in the kitchen, which reads as generosity in a way store-bought never will. They're sophisticated enough for a proper gathering but casual enough to justify making them on a random Tuesday afternoon.
The Art of Perfect Texture
The magic here is understanding the difference between flaky and greasy, which comes down to respecting the butter. When you pulse cold butter into flour, you're creating tiny pockets of fat that steam during baking, leaving behind little air gaps—that's flakiness. If the butter gets warm and blends completely into the dough, you lose those pockets and end up with something dense and oily that tastes more like shortbread than cheese straws. Once you understand this principle, you'll see it everywhere in pastry.
Storage and Variations That Keep Things Interesting
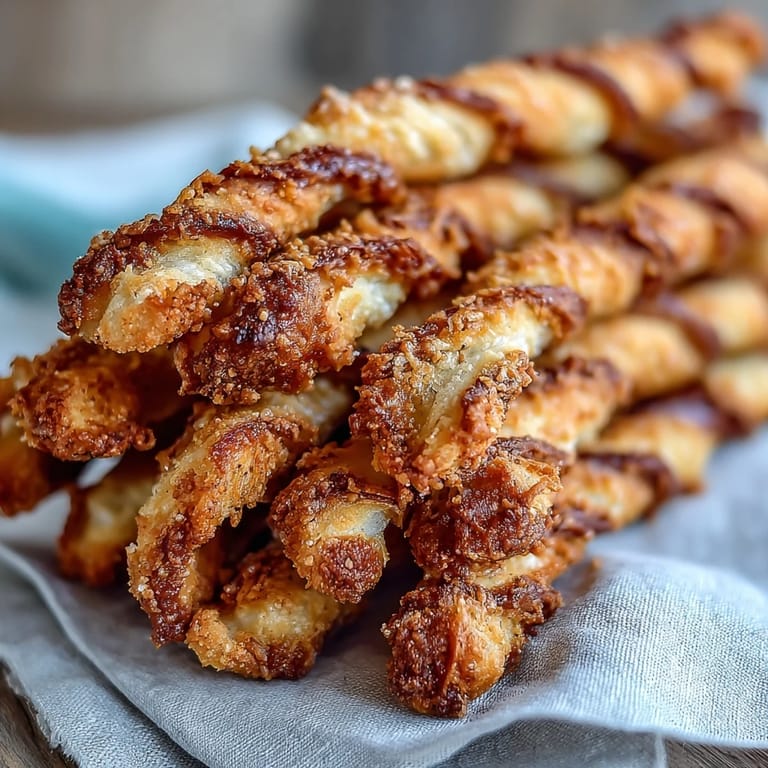
These keep in an airtight container for up to five days, though they rarely last that long in my house. You can twist them before baking for a spiral effect, sprinkle smoked paprika on top for depth, or even add a pinch of smoked salt if you're feeling adventurous. One friend swears by adding fresh rosemary, and another insists that shredded gruyere works beautifully if you're in the mood to experiment with the cheese balance.
- Make extra and freeze the unbaked straws on a baking sheet, then bake straight from frozen by adding two to three minutes to the cooking time.
- If you prefer less heat, reduce the cayenne to a quarter teaspoon and let the cheese be the star.
- Serve them warm if possible, though they're honestly perfect at any temperature.
 Save to Pinterest
 These cheese straws became my go-to because they ask for so little but deliver so much—thirty minutes and you have something that tastes like you spent hours fussing. That's the real magic of good cooking, isn't it?
Recipe Questions
- → What cheeses are used in these cheese straws?
The straws combine sharp cheddar and finely grated Parmesan cheeses, contributing to a rich, savory flavor profile.
- → How do you achieve the crispy texture of the cheese straws?
Rolling the dough thin and baking at 375°F until golden helps create a crisp, buttery finish that holds its shape well.
- → Can the level of spiciness be adjusted?
Yes, cayenne pepper quantity can be modified to taste, allowing you to control the heat level in the straws.
- → What are some serving suggestions for these straws?
They pair well with mint juleps or as part of a Southern-style appetizer spread, making them great for parties and gatherings.
- → Is it possible to decorate the straws before baking?
Yes, you can twist the strips for a decorative look or sprinkle smoked paprika on top for added flavor and visual appeal.