 Save to Pinterest
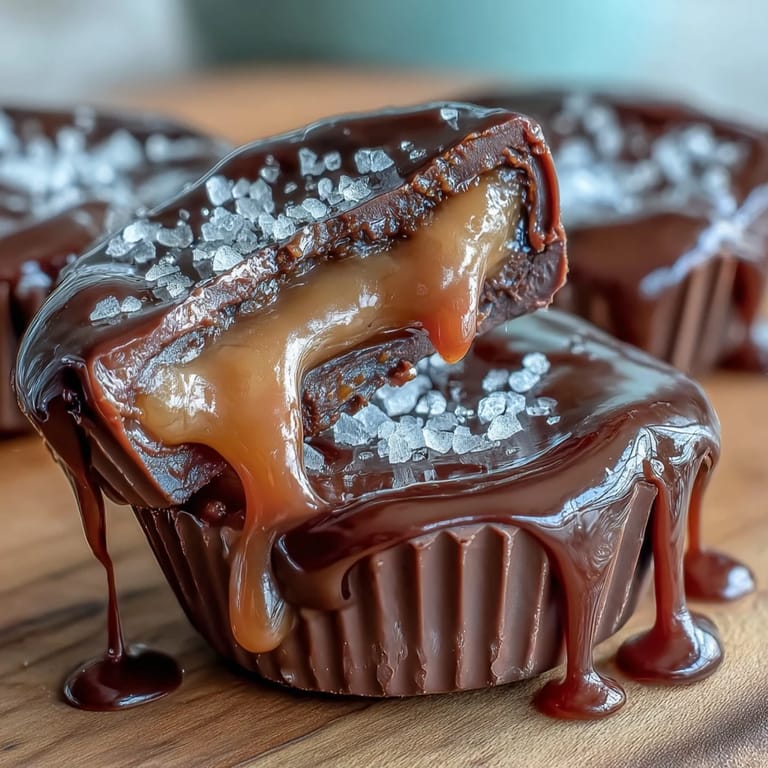
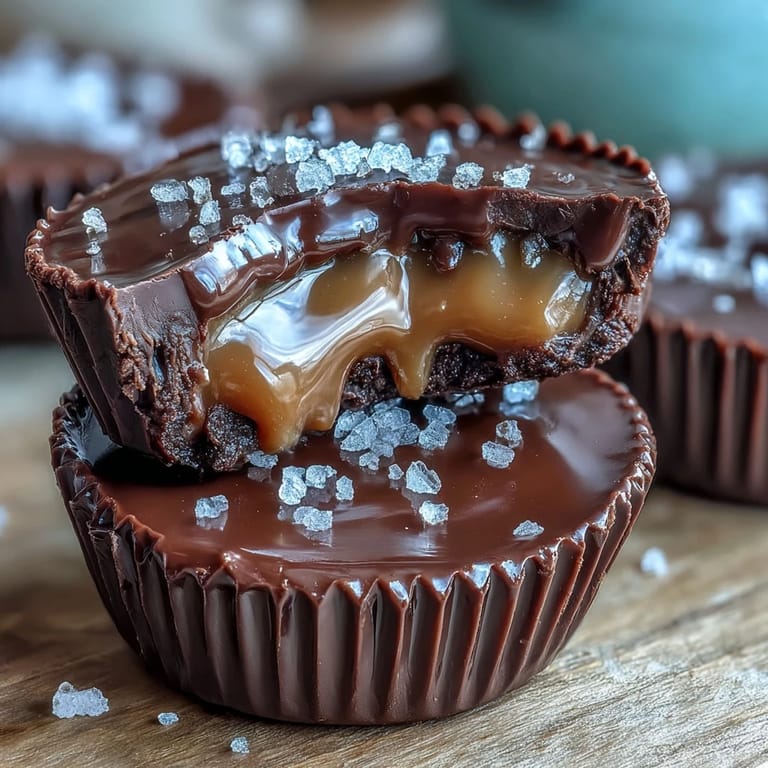
 There's something magical about the combination of sweet, salty, and creamy—and these Salted Caramel Homemade Peanut Butter Cups deliver all three in one irresistible bite. Imagine biting through a smooth chocolate shell to discover a layer of velvety peanut butter, followed by a gooey pool of salted caramel that melts on your tongue. Topped with a delicate sprinkle of flaky sea salt, these homemade treats are the perfect balance of indulgence and sophistication. Whether you're making them for a special occasion or simply treating yourself on a quiet afternoon, these peanut butter cups are guaranteed to impress.
Save to Pinterest Making peanut butter cups at home might sound intimidating, but this recipe breaks it down into simple, manageable steps. The key is working in layers: first the chocolate base, then the creamy peanut butter filling, followed by that luscious salted caramel, and finally another chocolate coating to seal it all in. The chilling time between steps ensures each layer sets perfectly, creating those distinct, beautiful layers you'll see when you bite into the finished cup. And the best part? You control the quality of every ingredient, from the chocolate you choose to the type of sea salt you sprinkle on top.
Ingredients
Tired of Takeout? 🥡
Get 10 meals you can make faster than delivery arrives. Seriously.
One email. No spam. Unsubscribe anytime.
- Chocolate Layer: 300 g (10 oz) semisweet or milk chocolate, chopped or chips, and 2 tbsp coconut oil or unsalted butter
- Peanut Butter Filling: 120 g (½ cup) creamy peanut butter, 2 tbsp powdered sugar, 1 tbsp unsalted butter (softened), and ½ tsp vanilla extract
- Salted Caramel: 100 g (½ cup) granulated sugar, 2 tbsp unsalted butter, 60 ml (¼ cup) heavy cream, and ¼ tsp fine sea salt
- Topping: Flaky sea salt, for sprinkling
Instructions
- Step 1: Prepare the muffin tin
- Line a muffin tin with 12 paper liners to create individual molds for your peanut butter cups.
- Step 2: Melt the chocolate
- Melt chocolate and coconut oil (or butter) together in a heatproof bowl over simmering water, or microwave in 30-second bursts until smooth.
- Step 3: Create the chocolate base
- Spoon about 1 tablespoon melted chocolate into each liner, tilting to coat the bottom. Chill in the freezer for 10 minutes to set.
- Step 4: Make the peanut butter filling
- In a bowl, mix peanut butter, powdered sugar, butter, and vanilla until smooth. Divide into 12 portions and flatten into small discs.
- Step 5: Prepare the salted caramel
- In a saucepan over medium heat, melt sugar until golden, swirling occasionally (do not stir). Add butter, stirring until melted. Slowly add cream (it will bubble), whisk until smooth. Stir in fine sea salt. Let cool for 10 minutes.
- Step 6: Assemble the layers
- Place a peanut butter disc onto each chilled chocolate base. Top with about 1 teaspoon cooled caramel.
- Step 7: Seal with chocolate
- Cover each cup with remaining melted chocolate, smoothing tops.
- Step 8: Add the finishing touch
- Sprinkle with flaky sea salt.
- Step 9: Set the cups
- Chill in refrigerator for at least 30 minutes until set.
- Step 10: Store properly
- Store in an airtight container in the fridge for up to one week.
Zusatztipps für die Zubereitung
Working with melted chocolate requires a gentle touch. If your chocolate seizes or becomes grainy, it's usually due to water contact or overheating. Always use a clean, dry bowl and melt slowly, whether using a double boiler or microwave. When making the caramel, resist the urge to stir the sugar while it melts—swirling the pan is enough. Stirring can cause crystallization. The caramel will be very hot when you add the cream, so add it slowly and carefully to avoid splattering. Let the caramel cool for the full 10 minutes before adding it to the cups; if it's too hot, it will melt the chocolate base. Finally, be patient with the chilling times—they ensure your layers stay distinct and your cups hold their shape.
Varianten und Anpassungen
This recipe is wonderfully versatile. For a nut-free version, substitute almond butter or sunflower seed butter for the peanut butter—the texture and flavor will be slightly different but equally delicious. Dark chocolate lovers can use bittersweet chocolate for a more intense, less sweet cup. If you want to experiment with flavors, try adding a pinch of cinnamon to the caramel for warmth, or mix a tiny bit of espresso powder into the chocolate for depth. You can also play with the salt—different types of flaky sea salt (like Maldon or fleur de sel) will give you varying levels of saltiness and texture. For a fun twist, add a small piece of pretzel or a few chopped peanuts on top of the caramel before sealing with chocolate.
Serviervorschläge
These peanut butter cups are luxurious on their own, but they pair beautifully with complementary flavors. Serve them alongside a hot cup of coffee or espresso to balance the sweetness, or with a cold glass of milk for a classic combination. They make an elegant addition to a dessert platter with fresh berries and whipped cream. For entertaining, arrange them on a pretty plate with other homemade candies or cookies. They're also perfect for gifting—pack them in a decorative box lined with parchment paper, and you have a thoughtful, impressive homemade present. Since they need to be stored in the refrigerator, take them out about 5-10 minutes before serving to let the chocolate soften slightly and the flavors bloom.
 Save to Pinterest
 Once you've mastered this recipe, you'll find yourself making these peanut butter cups again and again. They're the kind of treat that feels special every single time, whether you're enjoying one as an afternoon pick-me-up or serving them at a dinner party. The combination of textures—the snap of the chocolate, the creaminess of the peanut butter, the gooey caramel, and the crunch of sea salt—creates an experience that's far more interesting than any store-bought candy. And knowing you made them yourself, with real ingredients and your own two hands, makes them taste even better. So gather your ingredients, set aside an hour, and treat yourself to something truly extraordinary.
Recipe Questions
- → What types of chocolate work best for this dessert?
Semisweet or milk chocolate are ideal for a balanced sweetness and smooth texture. Use quality chips or chopped bars for best melting results.
- → Can I use alternative nut butters in place of peanut butter?
Yes, almond or sunflower seed butter can be substituted for a different flavor or nut-free option while maintaining creamy consistency.
- → How do I prevent the caramel from crystallizing?
Gently melt sugar without stirring, swirl occasionally, and add butter and cream carefully to achieve smooth caramel without graininess.
- → What is the purpose of the flaky sea salt topping?
The sea salt enhances the flavor contrast by adding a delicate salty crunch that complements the sweetness and richness of chocolate and caramel.
- → How should these cups be stored after preparation?
Store in an airtight container in the refrigerator to keep them firm and fresh, consuming within one week for optimal flavor.